Intro to Windows Kernel Exploitation Part 0 - Environment Setup
Introducing a new series on Windows kernel exploit development. Over the course of this series, we will use the HackSys Extreme Vulnerable Driver to showcase how to exploit a range of vulnerabilities, from simple stack buffer overflows to more complex issues such as use-after-free, pool buffer overflows, and race conditions.
In this first post I will show how to setup a Windows 10 VM for debugging and how to install the HackSys Extreme Vulnerable Driver.
Things you will need:
- HackSys Extreme Vulnerable Driver
- Windows VM: HEVD has been tested on Windows 7 SP1 x86 and Windows 10 x64. You can create a Windows 10 ISO here.
- Virtualization Software: It is best practice to load the vulnerable software into a virtual machine so we are not making our host easy to exploit. We will debug the driver remotely from our host. Either VMware or VirtualBox works fine.
- Windows Kernel Mode Debugger: I will be using WinDbg in kernel mode because it is a GUI debugger. For the console enjoyers, there is kd.
- A disassembler/decompiler: Choose your favorite tool, whether that’s IDA, Ghidra, Binary Ninja or radare2.
- Determination :)
On the shoulders of giants
Windows kernel debugging is difficult, especially for a first timer like me. While working through HEVD, I reference the blogs of wetw0rk, samdb, and Connor McGarr to help get me started. They all have excellent writeups and I encourage you to check them out. I do some things differently than they do - for example, I will be using C++ instead of Python to write my exploits and I install the driver differently than they do.
Here are the blogs that were very helpful:
- https://connormcgarr.github.io/Kernel-Exploitation-1/
- https://www.samdb.xyz/2016/01/16/intro_to_kernel_exploitation_part_0.html
- https://wetw0rk.github.io/posts/0x00-introduction-to-windows-kernel-exploitation/
Getting a Windows VM
HEVD supports Windows 7 SP1 and Windows 10 x64. You can choose either operating system, but I am going to start with Windows 10 x64 because I want a more modern OS to learn kernel exploit dev. However, there is nothing wrong with baby steps and starting with Windows 7 – I may make a series on that in the future. Either way, we will need to download an ISO that we can load into VMware or VirtualBox.
Microsoft has changed where to download Windows ISOs multiple times over the years. The current website is here and it allowed me to download a Windows 10 x64 ISO image. In 2025, I made a video showing how to use the WayBack Machine to download Windows VMs.
Once you have the ISO, it is time to create a VM.
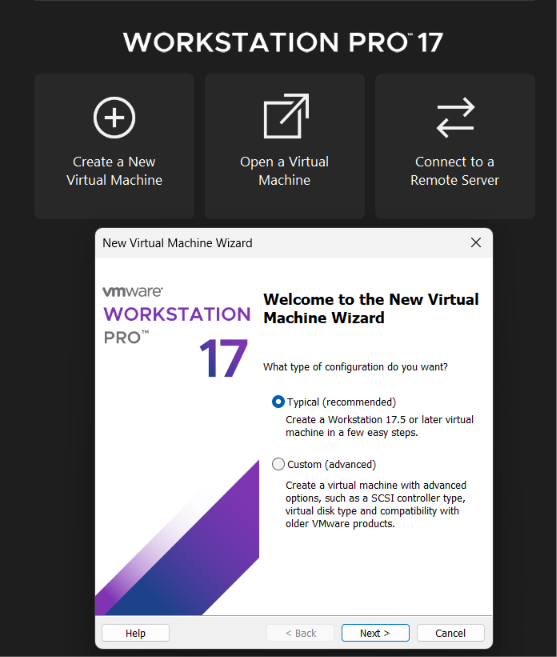
Select the ISO file
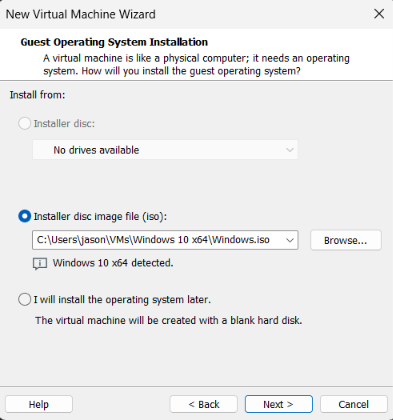
Follow the prompts and continue to create the VM. I chose to install without a product key and turned off the windows telemetry junk in the privacy settings.
When Windows is finished installing, it should look something like this:
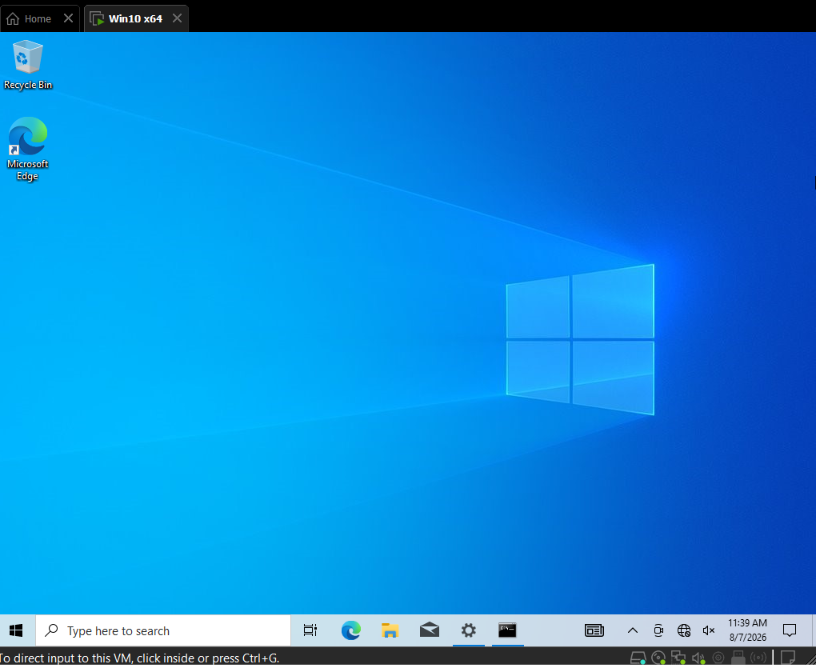
Feel free to tweak the VM settings. I added more RAM, CPU cores, and changed the network settings to “Host only mode” to avoid exposing this vulnerable VM to the Internet. Also, install VMware workstation tools (or the VirtualBox equivalent) to enable helpful things like copy-paste to and from the VM and shared folders.
Kernel Debugging
We will be using two operating systems in this series. Our host (aka debugger) and our target (aka debuggee). The target is the Windows VM that we have just installed. The host is your main OS where we will be writing the exploit and debugging it with WinDbg. My host is Windows 11 x64.
Configuring the Target Machine
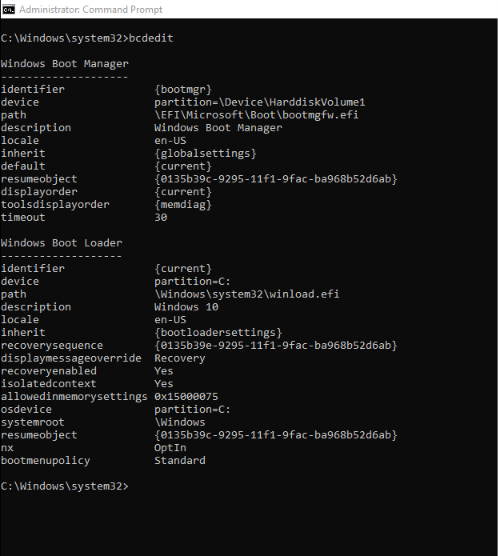
We will need to enable kernel debugging on our target machine. Open an administrator command prompt on the target and run bcdedit.
[!NOTE]
It is always a good idea to look at the output of a command before making changes to the machine
We see that debugging is not enabled. If you read the great blog posts from wetw0rk or samdb, they both use serial ports (COM ports) and named pipes to connect the host to the target. This is ok, but for Windows 8 or later guests, the better choice is to use a network connection. WinDbg displays a small warning message when trying to use the COM port.
Furthermore, in Windows Internals 7th Edition, the authors state that a network connection will result in 1000x performance gain:
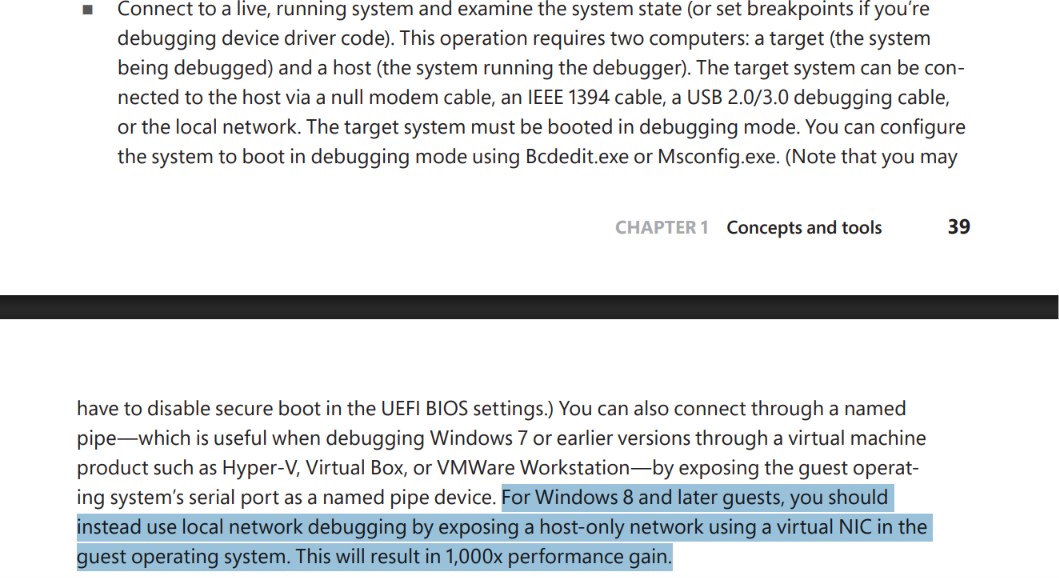
This performance gain is when compared to a physical connection:
https://x.com/zodiacon/status/2085913987175109110
For this section, I used a mix of commands from wetw0rk’s post and from the Microsoft documentation on setting up a kernel debugger manually.
Run the following commands:
bcdedit /copy {current} /d "Kernel Debugging On"

# replace with the UUID output of the previous command
bcdedit /debug {REPLACE_WITH_OUTPUT_FROM_ABOVE} on

# Replace w.x.y.z with the IP of your host machine.
# This will print a key, be sure to save it!
bcdedit /dbgsettings net hostip:w.x.y.z port:5000

# Confirm changes
bcdedit /dbgsettings
Confirm your settings look like the following. Ensure that dbgtype equals NET (I troubleshoot this for a couple hours lul)
C:\> bcdedit /dbgsettings
key                     XXXXXX.XXXXX.XXXXX.XXXXX
debugtype               NET
hostip                  169.168.1.1
port                    50085
dhcp                    Yes
The operation completed successfully.
You may need to create firewall rules between your host and guest to allow them to talk to each other. Test with pings. If you get stuck, refer to Microsoft’s troubleshooting tips.
Connect with WinDbg
Open WinDbg on the host computer.
- Select File > Attach to Kernel.
- Open the Net tab.
- Enter your port number, target IP address and key.
- Select OK.
You will get a message saying “Waiting to reconnect” and it will look something like this:
Using NET for debugging
Opened WinSock 2.0
Using IPv4 only.
Waiting to reconnect...
This is good.
Restart target PC
When the debugger connects and waits, reboot the target computer. One way to restart the PC is to use this command from an administrator’s command prompt:
shutdown -r -t 0
When the target restarts, the debugger in the host OS connects.
After connecting to the target on the host, select break on your debugger and you can start debugging.
That’s it for setting up kernel debugging! Next we will figure out how to load the driver.
Installing the driver
The HackSys Extreme Vulnerable Driver GitHub repo as well as many blog posts show using OSR Loader to load/install the driver. However, at the time of writing (August 2026) the OSR Loader tool is not longer available to download on their website. Perhaps it can be accessed through the magical wayback machine?
Looking at this screenshot of OSR Loader from wetw0rk’s blog we see that it takes a driver path, service start type, display name and a load group.
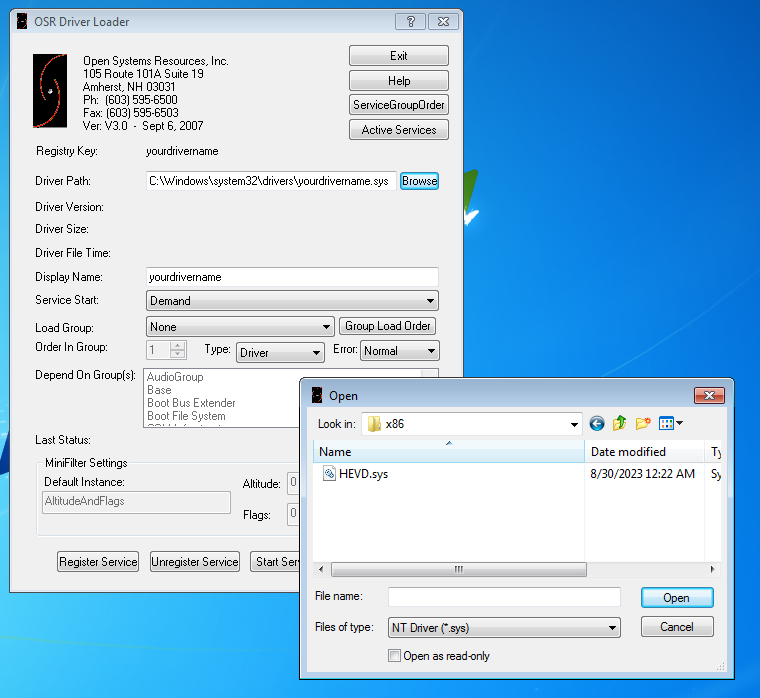
We can do the same thing with the sc.exe command. OSR Loader may just be a GUI wrapper around sc create, sc start, sc stop and sc delete. Here are the commands I used to install and confirm that HEVD.sys is running on my system:
# Register the driver as a service. A space is require after each equal sign bc windows is dumbo
sc.exe create HEVD type= kernel start= auto error= normal binpath= "C:\Users\jason\Desktop\HEVD\driver\vulnerable\x64\HEVD.sys" displayname= HEVD

# Confirm it is created and running
sc query HEVD
driverquery /v | findstr HEVD
reg query HKLM\System\CurrentControlSet\Services\HEVD

# Start it
sc start HEVD

# Confirm it is running
sc query HEVD
Troubleshooting Errors
When trying to start the driver, you may get an error saying the driver is unsigned:
C:\Windows\system32>sc start HEVD
[SC] StartService FAILED 577:

Windows cannot verify the digital signature for this file. A recent hardware or software change might have installed a file that is signed incorrectly or damaged, or that might be malicious software from an unknown source.
Fix 1: You can fix this by right clicking on the HEVD.sys file, selecting “Properties” and then “Unblock” the driver.
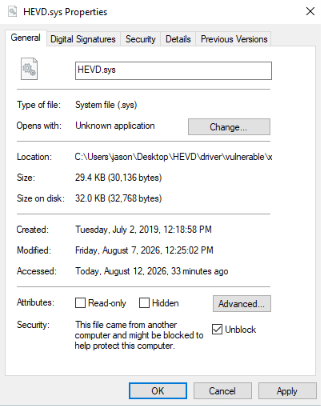
Fix 2: If that does not work, use advanced recovery options to disable driver signing enforcement.
Go to Settings > Recovery and select advanced options. When the computer restarts, choose option 7 to turn off driver signing enforcement.

Fix N: If you are still experiencing issues installing/starting the driver, reference this Stack Overflow post.
Loading symbols
Now that we finally have HEVD.sys installed, we can list it in WinDbg. However, we do not have symbols loaded.
Symbols are function names and other helpful debugging information that are typically stripped from production executables. This is to make the executable smaller and run faster. But for security researchers, debugging symbols are fantastic because they make reverse engineering a lot easier! In Windows, debug info is stored in PDB files.
Add a “local cache” to store our symbols on our host machine. I created a directory called C:\symbols.
kd> .sympath srv*C:\symbols*https://msdl.microsoft.com/download/symbols
hd> .reload
Trying to reload the symbol info fails. Reading the error, we can get more verbose error output by running:
kd> !sym noisy
Now try to reload the symbols for HEVD and we get this helpful error:
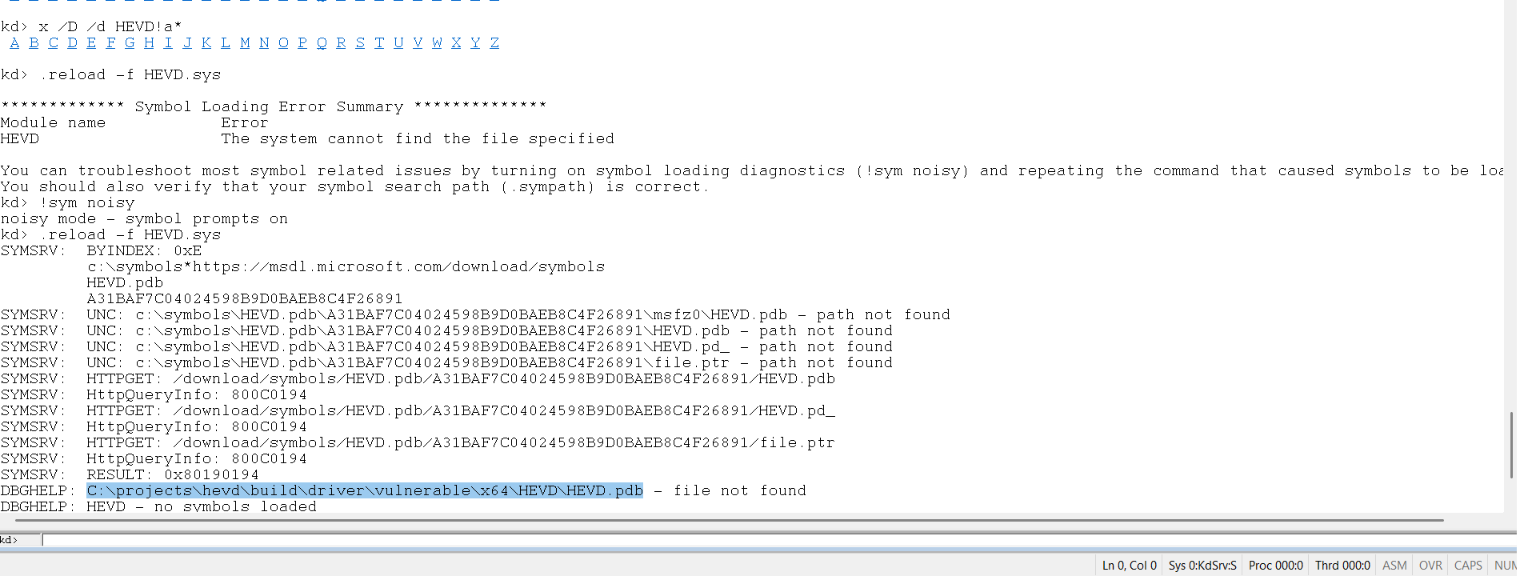
We see that WinDbg is looking for symbols in C:\projects\hevd\build\driver\vulnerable\x64\HEVD\HEVD.pdb. Let’s create that folder on our host system and copy our HEVD.pdb file to it.
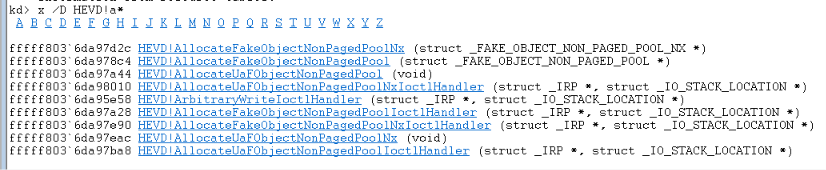
Reboot the target VM and we see that we now have symbols for HEVD.
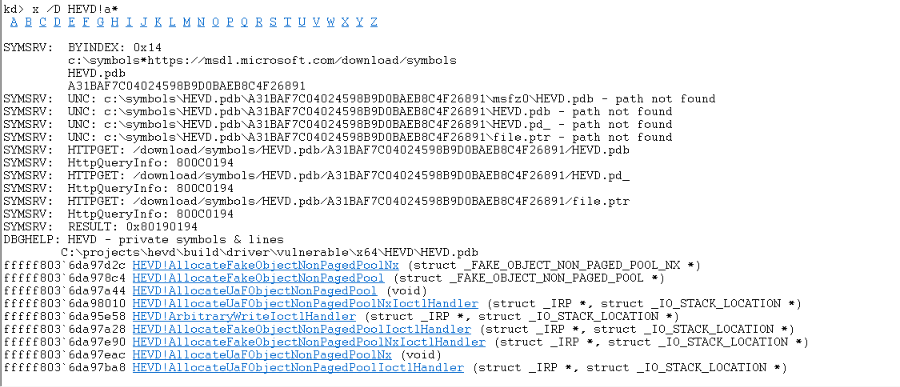
Even though this works, I went ahead and create c:\symbols\HEVD.pdb\A31BAF7C04024598B9D0BAEB8C4F26891\msfz0\HEVD.pdb and c:\symbols\HEVD.pdb\A31BAF7C04024598B9D0BAEB8C4F26891\HEVD.pdb as well to get rid of all the warning/error messages.
Conclusion
In this post we learned how to set up an environment for reverse engineering and exploiting Windows kernel drivers. In the next post, we will learn how to interact with the HEVD via IOCTLs and trigger a stack buffer overflow in the kernel!
Thanks for reading and happy hacking!